Google Ads integration
Introduction
Setting up at least one conversion action with an associated data source forms the basis for importing the events recorded in schlau.io as conversions in your Google Ads account. Please note that the required data source can only be set up if at least one event was tracked by schlau.io on the previous day that can be assigned to a click generated by Google Ads as a conversion. Your schlau.io project will therefore show you whether it is currently possible to set up the Google Ads integration.
Conversion action
In order for the conversion data recorded by schlau.io to be imported into your Google Ads account, it is first necessary to set up at least one corresponding conversion action. To set up a conversion action, go to "Goals" in the navigation on the left and then to "Summary". In the view that opens, click on the blue button labeled "+ Create conversion action".
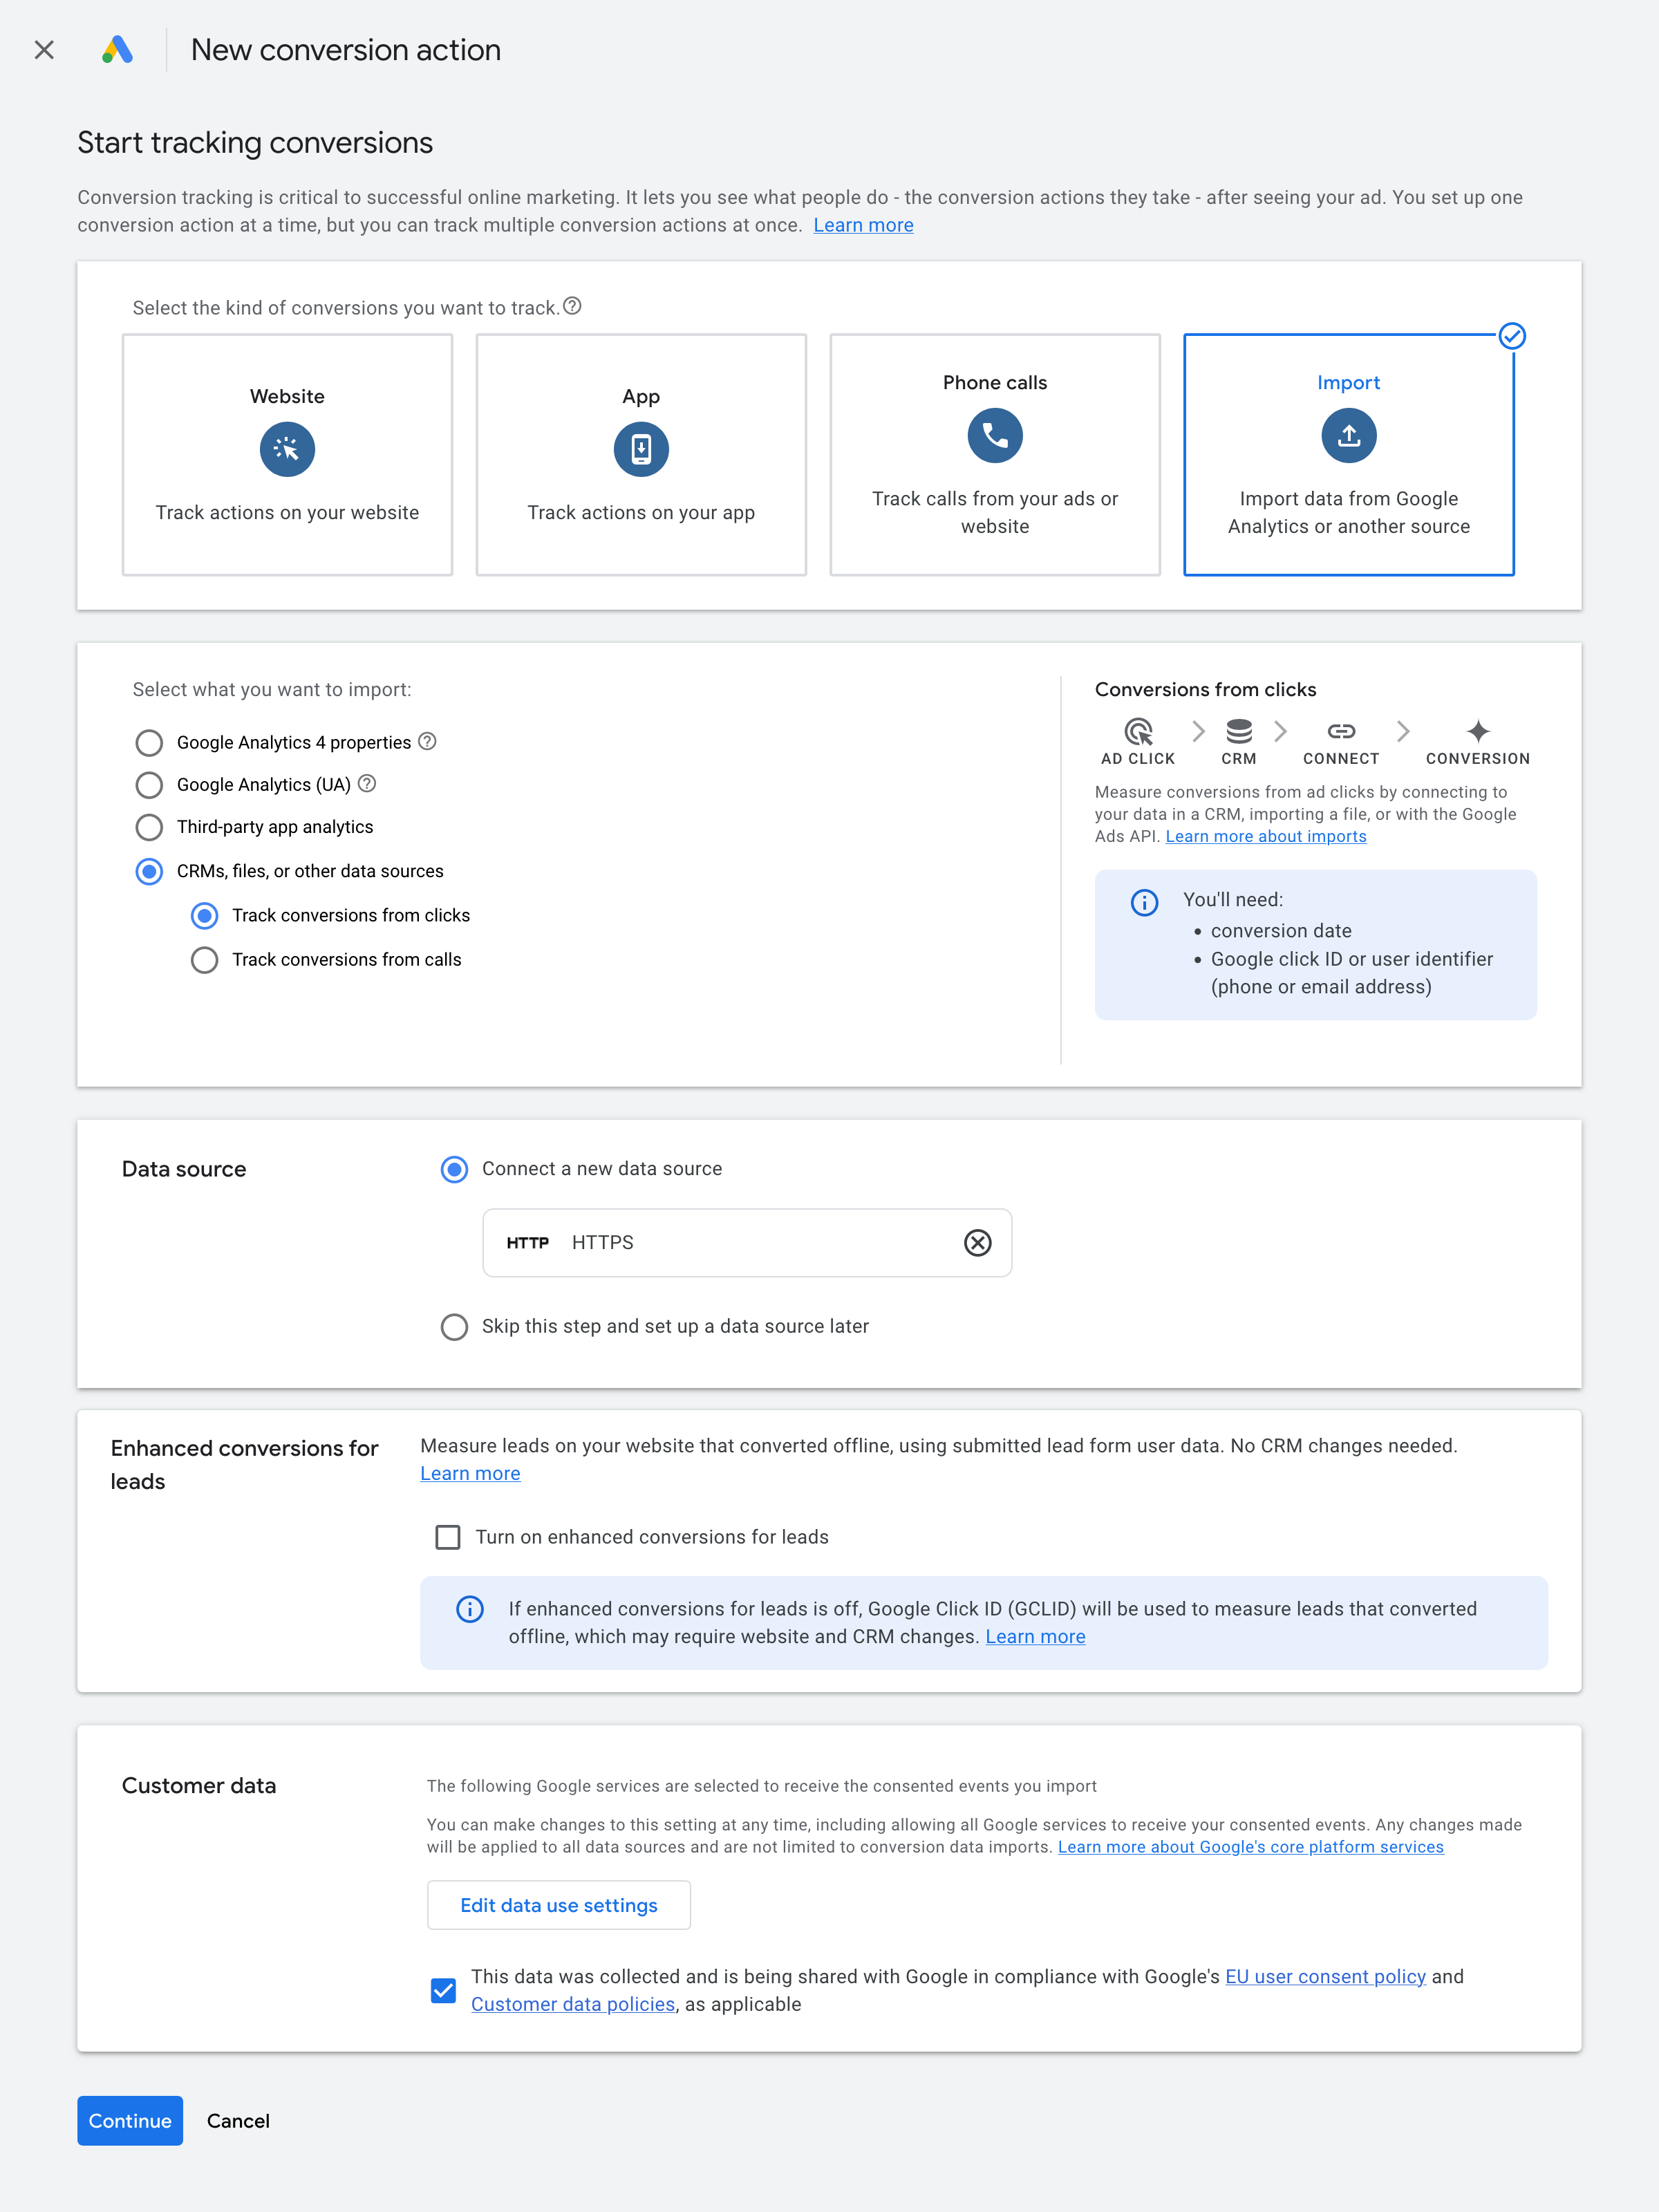
In the first step of the view that opens, select "Import" as the type of conversion. In the next step, select the option "CRM systems, files, or other data sources" and then the sub-item "Track conversions from clicks". In the next step, select the "Connect a new data source" option and the "HTTPS" option under "Featured products". Please note that you must not tick the checkbox in the “Enhanced conversions for leads” section. In the last step of the current view, confirm the checkbox in the "Customer data" section and click on the blue button labeled "Continue". In the view that now opens, select the appropriate category for the conversion action and click on the blue button labeled "Set up".
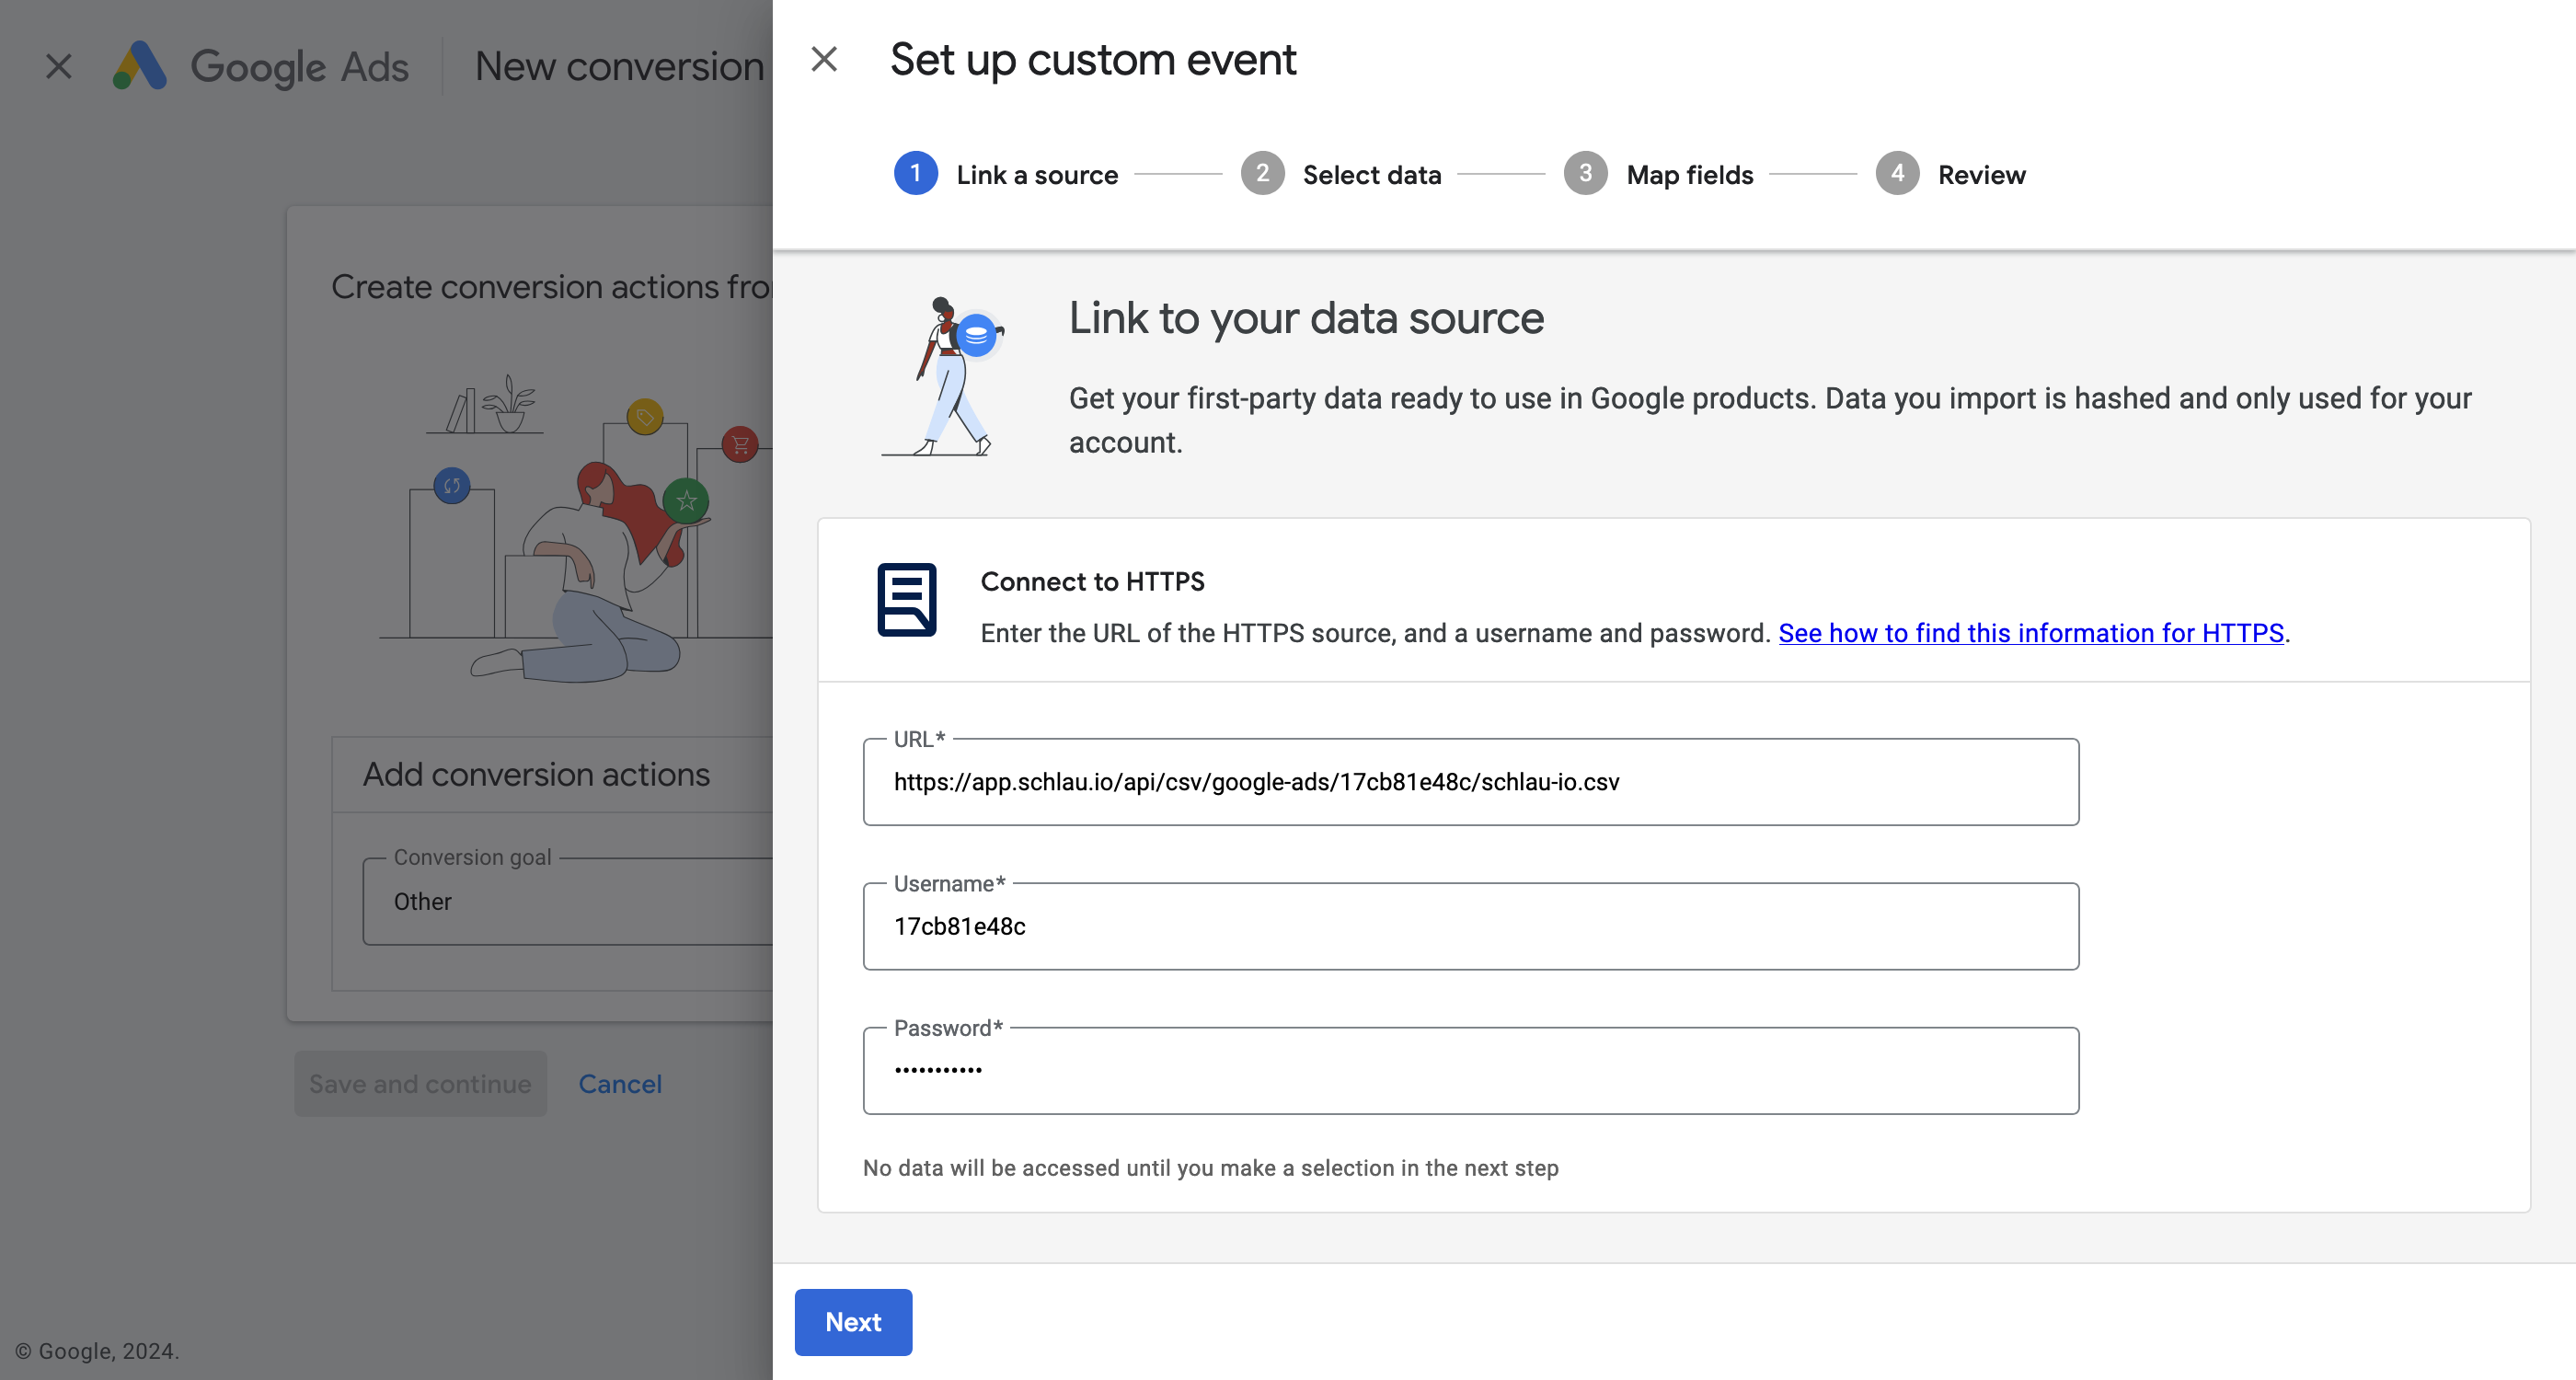
Now you have the option of connecting the data source. You can find the required "URL" as well as the "Username" and "Password" in your schlau.io project. As soon as you have entered the required data, click on the blue button labeled "Next".
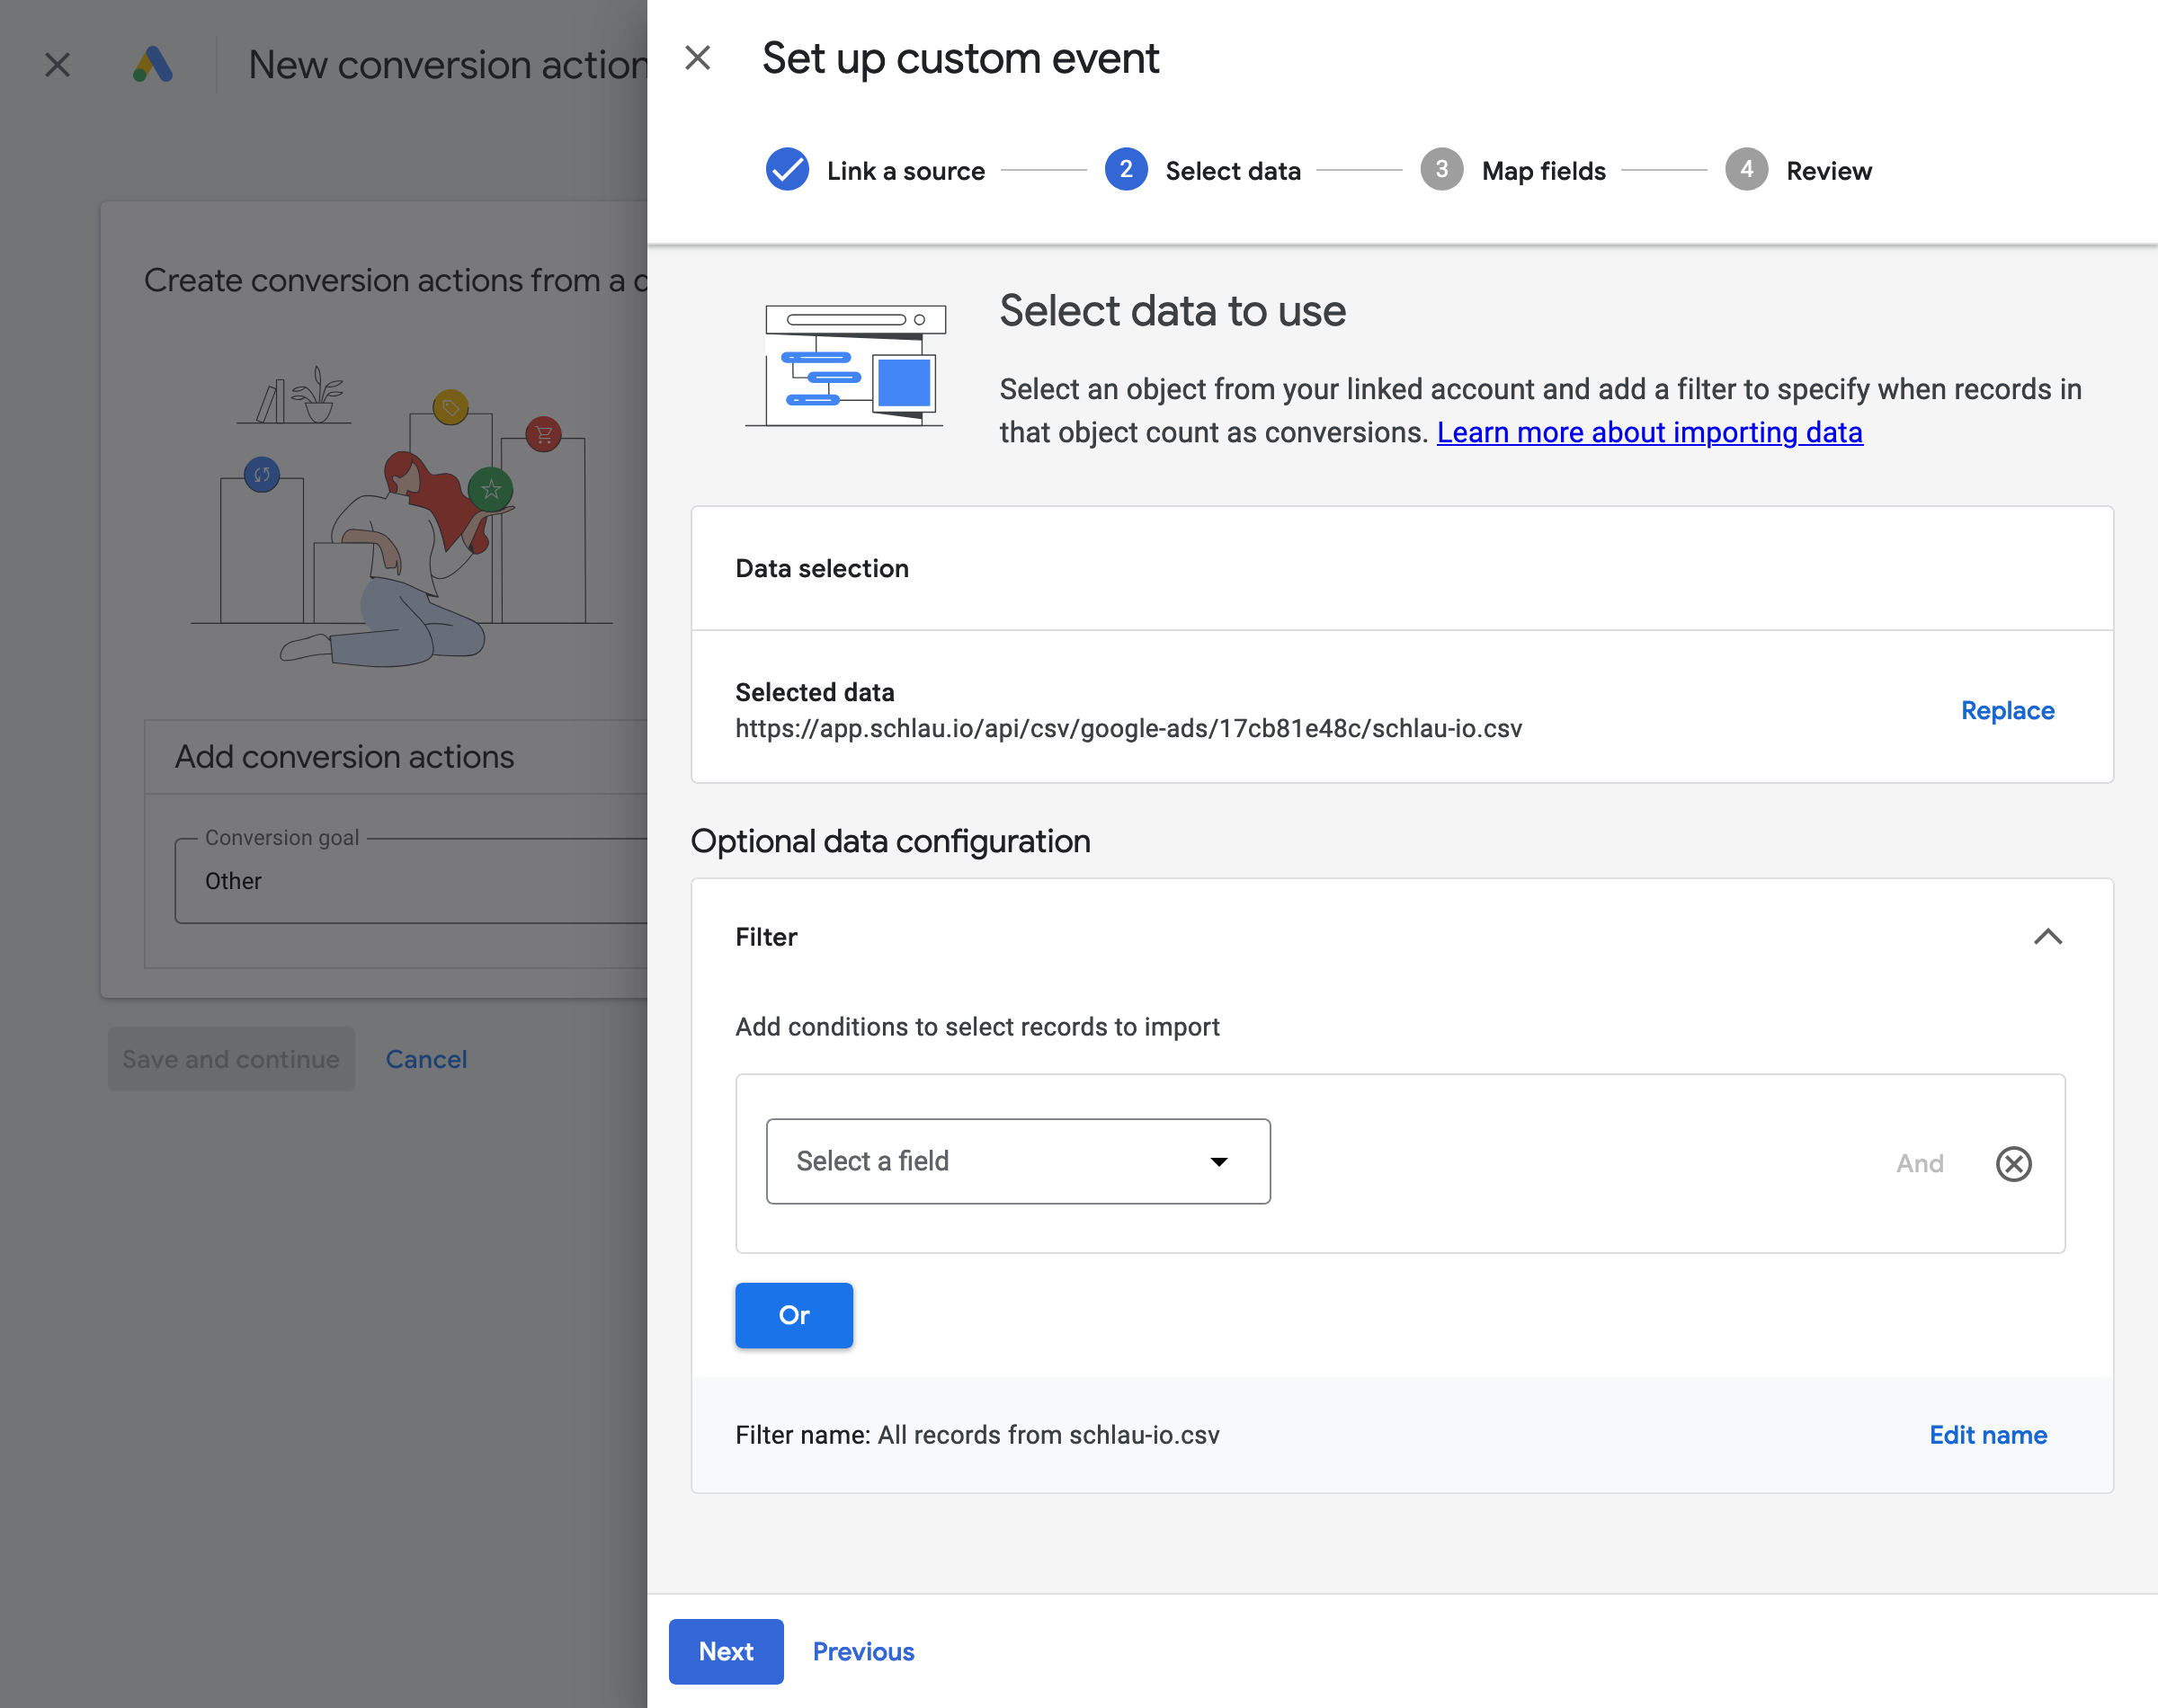
In the next step, you have the option of setting a filter. You can record all schlau.io events in one conversion action or set up different conversion actions for different schlau.io events. If you want to set up different conversion actions for different schlau.io events, you can use the "conversion_name" field to filter the events recorded in schlau.io in the way that best suits your use case. As soon as you have finished setting up the filter or if you do not need a filter, you can click on the blue button labeled "Next".
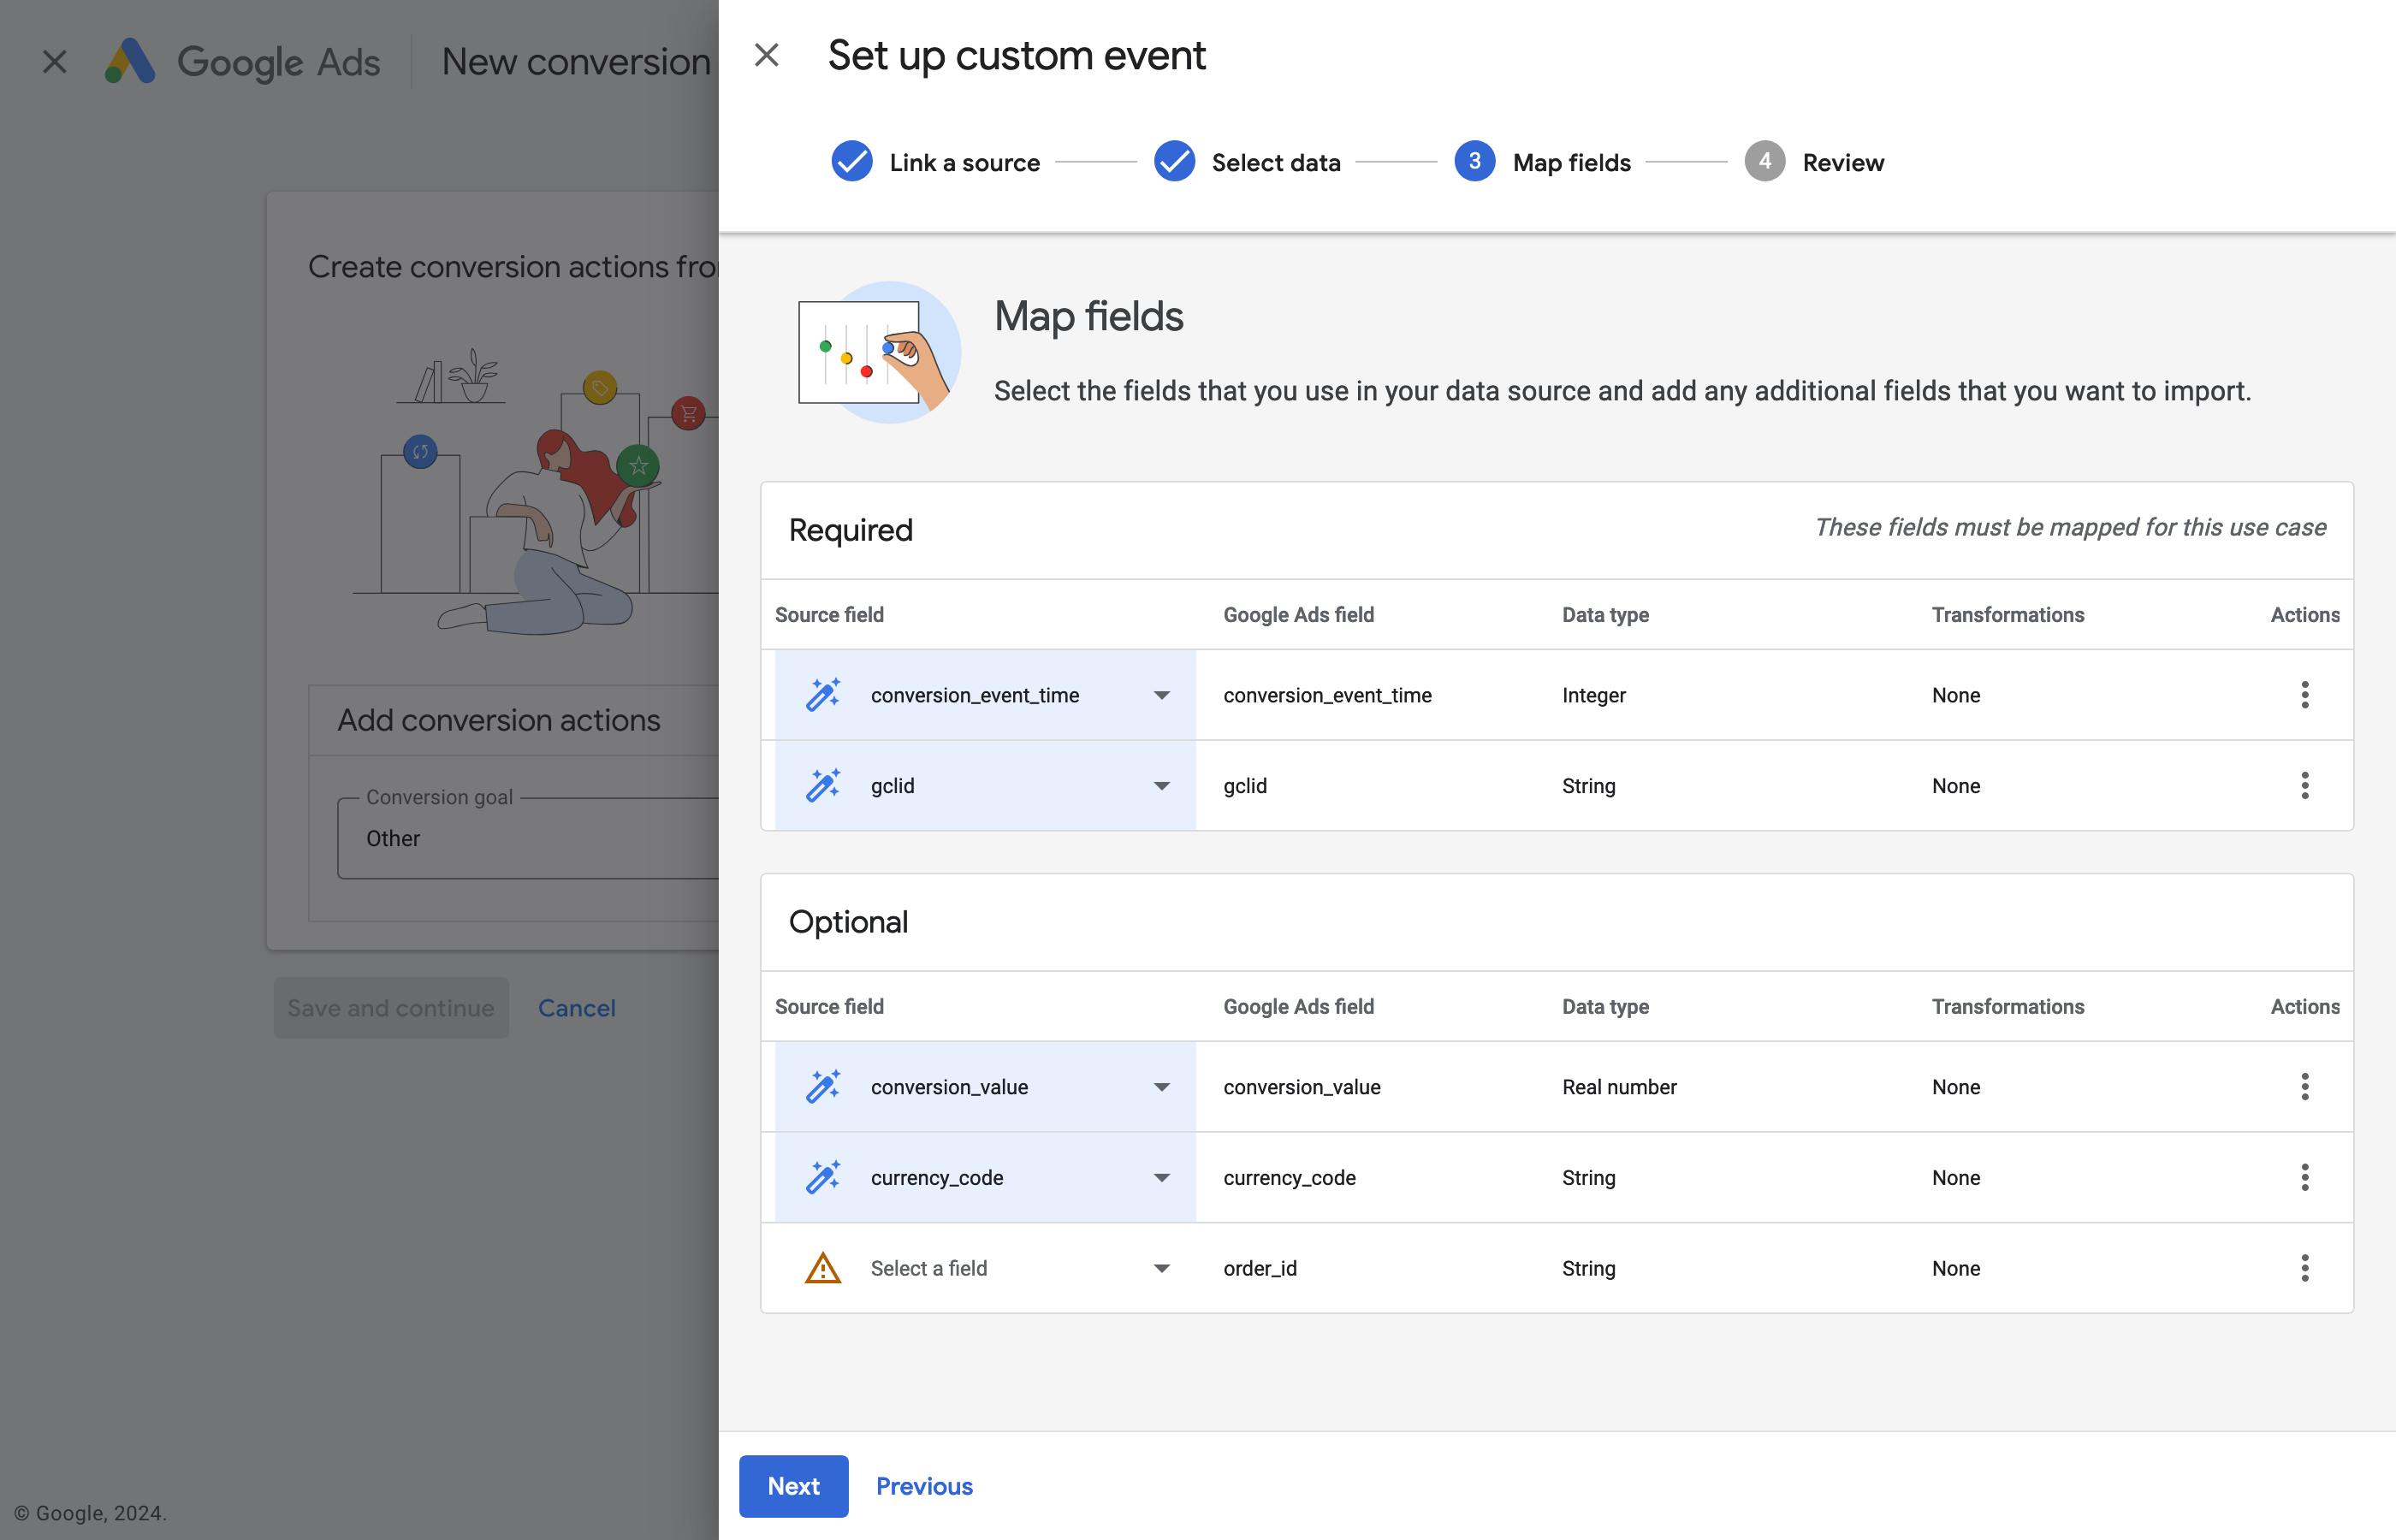
In the step "Map fields", you only have to wait a moment as the required fields "conversion_event_time" and "gclid" as well as the optional fields "conversion_value" and "currency_code" are automatically assigned. Please note that schlau.io does not collect any data for the optional field "order_id", as this would contradict the privacy-oriented approach of schlau.io. As soon as the automatic mapping is complete, you can click on the blue button labeled "Next".
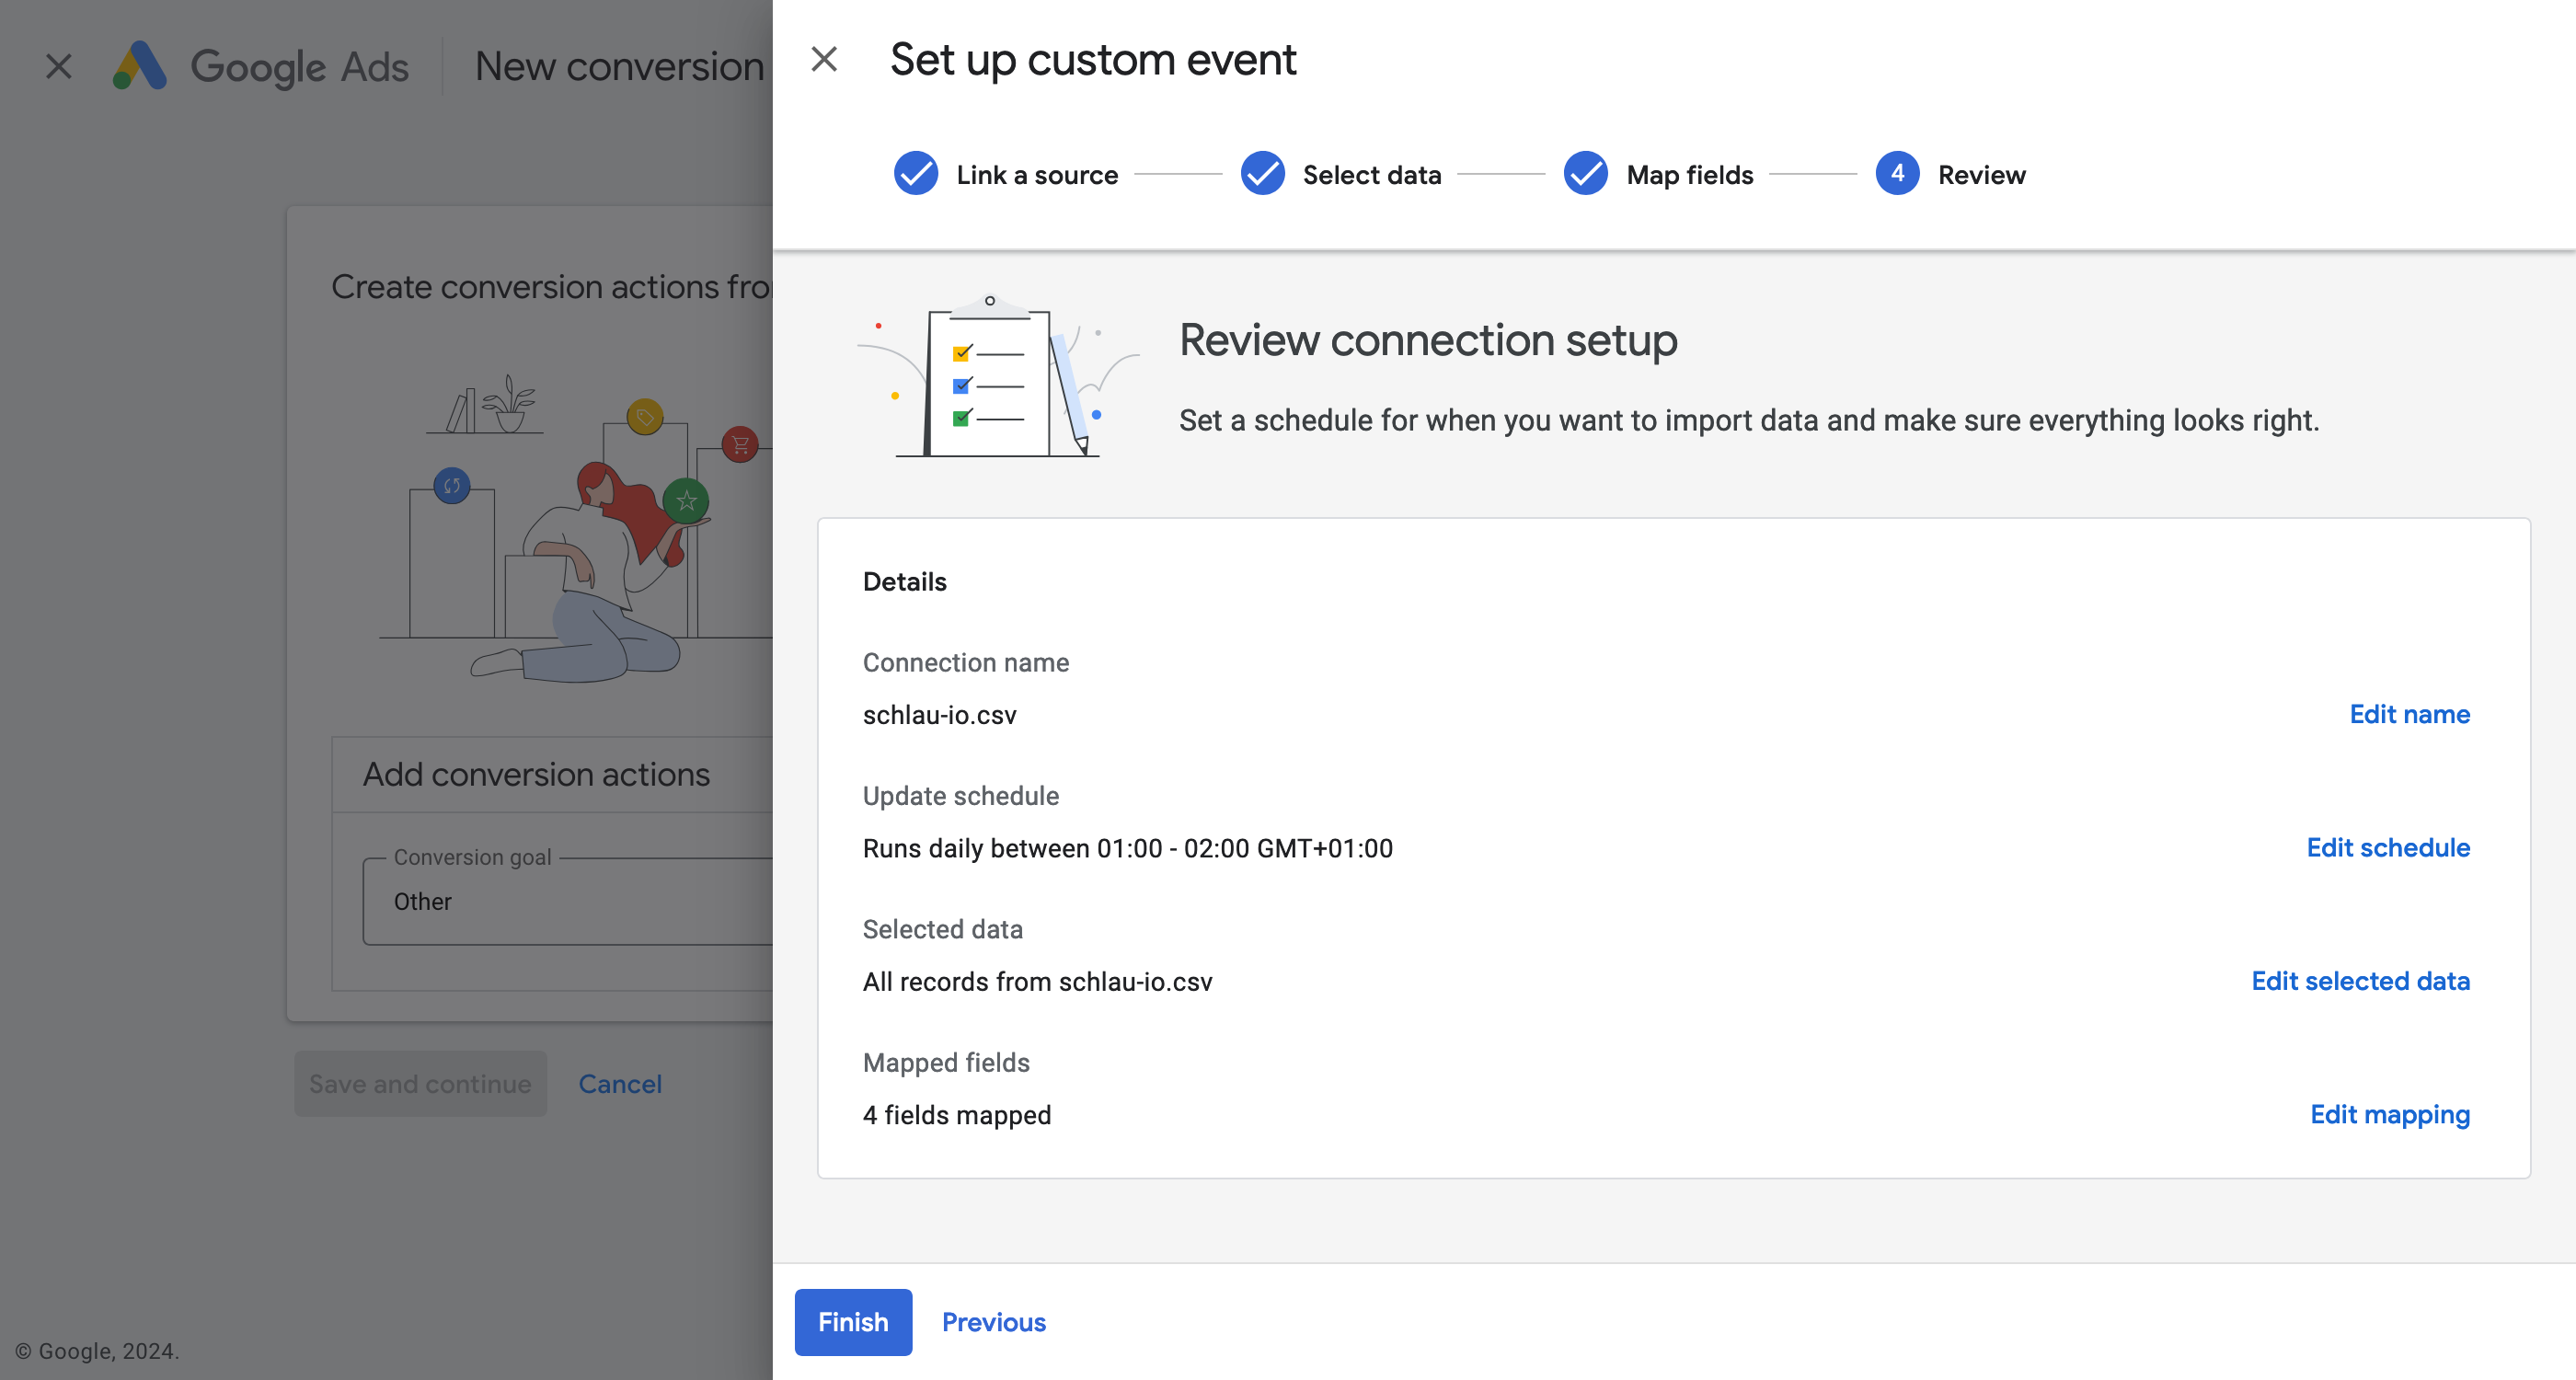
In the last step, you should first revise the schedule. Select the option "Daily" as the "Frequency", the option "Between 1 AM and 2 AM" as the "Start Time" and the appropriate time zone for your project. If all settings are correct, you can click on the blue button labeled "Finish". The setup of the data source associated with the new conversion action is now complete and you can click on the blue button labeled "Save and continue". This also completes the setup of the new conversion action. If necessary, you can now adjust the settings of the conversion action by clicking on the newly set up conversion action.